Wednesday, January 25, 2012
An Apology and then Bavarian treats!
First up is an apology for not blogging for so long. I was out of Munich for a couple months and also am not working at the moment so funds are very low - and as you know - GF flours are not cheap - so have not been doing any experimenting lately. I am hoping this will change in February. Thanks for your patience.
Gluten & Milk Free Chocolate Cupcakes
Makes 20 cupcakes
Ingredients:
30 grams Quinoa Flour
75 grams Millet or Sorghum Flour
75 grams Amaranth Flour
25 grams Tapioca Flour
1 teaspoon GF Baking Powder
1 teaspoon Baking Soda
100 grams Dutch Cocoa Powder
1/2 teaspoon salt
225 grams Muscovado Sugar
60 grams Milk Free Margarine softened
3 eggs
2 teaspoons GF Pure Vanilla Extract
3/4 cup Goat's Buttermilk (I find this at Basic Bio Shop)
Sift all the flours together in a bowl along with the baking powder, baking soda, salt and cocoa - set aside.
Mix margarine and sugar in a stand mixer (or in a bowl with a hand mixer) until well blended and creamy.
Add one egg at a time and mix until blended.
Add vanilla and buttermilk.
Slowly add the dry ingredients to the stand mixer while on low (2) speed. Once all ingredients are combined, mix on speed 3-4 for a minute or two until well mixed. Do not over mix!
Use your judgement on the consistency of the mixture. You may need to add a bit more buttermilk or flour (use any of the above) until you have a thick yet still able to be poured batter consistency.
Fill cupcake liners 2/3 full and bake at 180°C (350°F) 20-22 minutes. Remove from oven and let stand for 10 minutes, then remove from pan and place on wire rack to cool
Wednesday, August 24, 2011
Gluten and cow's Milk Free Raspberry filled Chocolate Cupcakes
Gluten & Cow's Milk Free Raspberry filled Chocolate Cupcakes
Makes 24 cupcakes
Dry Ingredients:
30 grams Quinoa Flour
60 grams Millet or Sorghum Flour
60 grams Amaranth Flour
30 grams Rice Flour
Makes 24 cupcakes
Dry Ingredients:
30 grams Quinoa Flour
60 grams Millet or Sorghum Flour
60 grams Amaranth Flour
30 grams Rice Flour
20 grams Tapioca Flour
2 teaspoons GF Baking Powder
100 grams Dutch Cocoa Powder
1/2 teaspoon salt
1/2 teaspoon salt
225 grams Muscovado Sugar
Wet Ingredients:
60 grams Milk Free Margarine softened
Wet Ingredients:
60 grams Milk Free Margarine softened
3 eggs
2 teaspoons GF Pure Vanilla Extract
3/4 cup Goat’s Buttermilk (I buy this at Basic)**
** When mixing wet ingredients - depending on the flour mixture you use and the size of the eggs - you may need between 1/2 - 1 cup of the buttermilk. I start out with 1/2 cup and add 1/4 cup at a time depending on the consistency of the batter at the end.
Sift all the dry ingredients together in a bowl and set aside.
**Mix all the wet ingredients in a stand mixer (or in a bowl with a hand mixer) until well blended.
Slowly add the dry ingredients to the stand mixer while on low (2) speed. Once all ingredients are combined, mix on speed 3-4 for a minute or two until well mixed. Do not over mix!
Fill cupcake liners 2/3 full and bake at 180°C 22-23 minutes. Remove from oven and let stand for 10 minutes, then remove from pan and place on wire rack to cool
Let cupcakes cool completely!!
Next step is to add the raspberry filling
Fill a piping bag with your favorite raspberry jam or filling. Using a filling tip (these are the long thin tubes - something like this one - can be plastic or metal). Once cupcakes are completely cooled - just insert the tip into the middle of the cupcake and squeeze some jam inside. Be carefull not to fill it too much, or the cupcake can explode ;-) Many people recommend using an apple corer to remove a bit of the center, but I prefer not to use this method. As long as you have the longer tip and watch how much you are squeezing in, they turn out better (as you still have all the cake part too)
Next - frost your cupcakes
You can do this however you choose. I used my standard buttercream frosting. I mixed half with cocoa powder and half with pink coloring and then topped with a raspberry.
Monday, August 1, 2011
Gluten and cow's Milk Free Margarita Cupcakes
I saw this post from Brown Eyed Baker on Facebook and knew these would be my next cupcakes to make. They turned out so yummy!!!
Below is the adapted recipe to make them gluten free and cow's milk free.
Margarita Cupcakes - 12
For the Cupcakes:
75 grams Millet Flour
50 grams Amaranth Flour
50 grams Rice Flour
25 grams Quinoa Flour
25 grams Tapioca Flour
1½ teaspoons Baking Powder
¼ teaspoon Salt
113 grams Margarine
190 grams Castor Sugar
2 Eggs
Zest and Juice of 1½ Limes (the juice of the other ½ will be used in the frosting)
2 tablespoons Tequila
¼ teaspoon Vanilla Extract
½ cup Goat’s Buttermilk
To Brush the Cupcakes:
1 to 2 tablespoons Tequila
For the Tequila-Lime Frosting:
113 grams Margarine
113 grams Butter Crisco
500 grams Powdered Sugar
1 tablespoon Lime Juice
2 tablespoons Tequila
Pinch of coarse Salt
1. Preheat the oven to 180°C. Line a cupcake tin with paper liners.
2. In a medium bowl, whisk together the flours, baking powder and salt.
3. In a stand mixer on medium-high speed, beat the margarine and sugar together until pale, light, and fluffy (about 5 minutes).
4. Reduce the mixer speed to medium and add the eggs one at a time, mixing thoroughly after each addition.
5. Scrape the sides of the bowl and add the lime zest, lime juice, vanilla extract and tequila. Mix until combined. (The mixture may start to look curdled at this point, but don’t worry, it will all come back together, power on!)
6. Reduce the mixer speed low. Add the dry ingredients in three batches, alternating with the buttermilk in two batches. Mix only until just incorporated, using a rubber spatula to give it one last mix by hand.
7. Fill cupcakes liners ¾ full. Bake for approximately 23-25 minutes or until just slightly golden and a toothpick shows only moist crumbs attached.
8. Allow cupcakes to cool for 5 to 10 minutes, and then remove to a cooling rack. Brush the tops of the cupcakes with the 1 to 2 tablespoons of tequila. Set the cupcakes aside to cool completely before frosting them.
9. To make the frosting, whip the margarine and crisco on medium-high speed in your stand mixer using the whisk attachment for 5 minutes. Reduce the speed to medium-low, and gradually add the powdered sugar, mixing and scraping the sides of the bowl until all is incorporated. Give it a mix on medium speed for about 30 seconds. Add the lemon juice, tequila and salt mix on medium-high speed until incorporated and fluffy. If the frosting appears a bit too soft, add some additional sugar, one spoonful at a time until desired consistency is reached. Frost cupcakes and garnish, if desired, with lime zest, an additional sprinkling of salt and a lime wedge.
Thursday, June 23, 2011
Gluten and Milk Free Corn Dogs (and Homemade Baked Beans)
So, I saw this post on Gluten Free Girl and decided to try it. They turned out great. For the flours, I used a mix of Amaranth, Teff, Quinoa, Millet and Corn Starch. I used 1 part of this mixture to 1 part of Corn Meal. I used Goat's milk instead of Cow's. I also added a bit of Xanthum Gum - just to ensure the mixture held together and to the hot dogs (or in this case Austrian style wieners - used ones from Rewe that were gluten and lactose free). I also bought 2 sizes, the longer ones (more like a US hot dog) and the shorter ones.
When I told Guy I was going to make these - his response was "I have never had corn dogs!" I could not believe it!!!! So, made making them that much more special :)
For the Baked Beans, I used my friend Chungchi's wonderful recipe that I have made for over 10 years! here is that recipe,
Homemade Baked Beans
Ground in a skillet...
200 grams ground beef
200 grams bacon
large onion
Then mix in a large bowl with the following
1 can of kidney beans, drained
1 can of pinto beans, drained
1 can of butter beans, drained
1/2 cup brown sugar
1/2 cup ketchup
1 teaspoon mustard
2 teaspoons vinegar
Then put it into a baking dish and bake at 180C for an hour.
Was a great meal and my Guy enjoyed the corn dogs :)
There was plenty of left over batter, so I made hush puppies with what was left :)
Monday, May 23, 2011
Red Velvet Rose Cake with Cream Cheese Frosting Gluten & cow's Milk Free
I saw this cake on Pinterest and absolutely fell in love with it. I thought, although it looks so complicated, it really should be quite easy to do, as each of the roses are just like I usually frost my cupcakes - so I decided to try it. The cake and decorating idea come from Casey Cooks blog. She also has a very nice little tutorial video on how to do the roses if you do not know how. I have simplified the instructions a bit below - please visit her site for full instructions. Before I made the cake, I did a test batch as cupcakes (as they bake more evenly in my little oven that doesn't always work). and then made the cake.
The alterations I made.
First, before starting, I of course converted most things to weight measurements. I also reduced the amount of oil used. I used goat's products instead of cow's. I also used Muscovado Sugar in my test recipe. In the cake recipe I used castor sugar. I found with the GF flours, that the Muscovado worked loads better. I tried 2 different coloring techniques. For the test batch, I used Wilton no-taste red. For the cake, I used liquid generic brand red. They gave a diff color - both were nice. And of course, used GF flours ;-) In this post, you will find the altered recipe for the cupcakes.
Red Velvet Rose Cake with Cream Cheese Frosting Gluten & cow's Milk Free
Makes 2 rounds to form 1 double round.
adapted from http://www.caseycooks.com/2011/04/red-velvet-rose-cake-cake-decorating.html
Cake
2 eggs
300 grams Canola Oil
1 cup Buttermilk
3 teaspoons Vinegar (I used white wine vinegar)
1 teaspoon GF Pure Vanilla Extract
Red Food Colouring (I used Wilton no-taste red and mixed it with 1 Tabelspoon water until it was a deep dark red)
140 grams Millet or Sorghum Flour
100 grams Amaranth Flour
50 grams Tapioca Flour
50 grams White Rice Flour
40 grams Quinoa Flour
20 grams Corn Starch
350 grams Fine White Sugar
10 grams Unsweetened Dutch Cocoa
1 teaspoon Baking Soda
1 teaspoon Salt
Frosting
200 grams Goat’s Cream Cheese, softened
220 grams Crisco (white, not butter flavoured)
2 teaspoon vanilla
600 grams Powdered Sugar, sifted
Equipment
Large pastry bag and large couplet
1M tip
Preheat oven to 180°C. Spray two 8-inch cake pans and line bottom with baking paper.
In a stand mixer bowl, slightly mix egg using the whisk attachment. Add remaining liquid ingredients and mix on low continuing to use the whisk attachment until blended.
Combine all the dry ingredients in a separate bowl and mix until combined. Add to the wet ingredients and mix on medium-high until completely combined, about one minute.
Divide batter equally among the two cake pans. Drop pans onto the counter from about 3-inches up to release any air bubbles. Repeat twice.
Bake for 30 minutes or until a toothpick inserted into the centre of the cake comes out clean.
Allow cakes to cool completely on wire racks. While you are waiting, make the frosting. In the bowl of a stand mixer, cream together the butter and cream cheese until smooth. Add the vanilla and mix. Gradually mix in the confectioner's sugar. Refrigerate for about 20 minutes prior to using. Keep any frosting you are not using covered in the fridge.
Place one of the cakes on the plate or platter you intend to use a (I always put the bottom layer top side down, so that your new top is flat (ie, the bottom). Apply a layer of icing to the top of the first cake. This will be the icing between your two layers, so with that in mind apply more or less icing depending on how much frosting you like.
Place the second cake on top of the first, making sure the two are properly aligned. Then, apply the crumb layer. A crumb layer is a thin layer of frosting you apply to a cake to hold in the crumbs, so that the final product is beautiful and crumb-free. Wait for the crumb layer to dry before applying the icing roses.
Sunday, May 22, 2011
Hydrangea Cupcakes - Take 2 Gluten & Cow's Milk Free
I needed to do a test batch for the Red Velvet Cake, plus I had promised my friend Karen I would give her a hydrangea cupcakes that I made the last time but there were none left, so perfect reason to make them. The cupcake recipe is adapted from Casey Cooks Blog.
More detail in the above blog about the cake. This recipe is halved from the other. The decorating technique again was adapted from Glorious Treats' blog
Wet Ingredients
1 egg
150 grams Canola Oil
1/2 cup Buttermilk
1 ½ teaspoons Vinegar (I used white wine vinegar)
1/2 teaspoon GF Pure Vanilla Extract
Red Food Colouring (I used Wilton no-taste red and mixed it with 1/2 Tablespoon water until it was a deep dark red)
Dry Ingredients
50 grams Amaranth Flour
70 grams Millet or Sorghum Flour
25 grams Tapioca Flour
25 grams White Rice Flour
20 grams Quinoa Flour
10 grams Corn Starch
130 grams Muscovado Sugar
5 grams Unsweetened Dutch Cocoa
1/2 teaspoon Baking Soda
1/2 teaspoon Salt
Preheat oven to 180°C.
In a stand mixer bowl, slightly mix egg using the whisk attachment. Add remaining liquid ingredients and mix on low continuing to use the whisk attachment until blended.
Combine all the dry ingredients in a separate bowl and mix until combined. Add to the wet ingredients and mix on medium-high until completely combined, about one minute.
Pour into your prepared cupcake pans and bake for 18-20 min or until a toothpick inserted into the centre comes out clean.
Cool for 10 minutes and then transfer to a wire rack to cool completely before frosting.
Sunday, May 8, 2011
Gluten Free Caramel/Peanut Butter Chocoate Bars with Almond Base
So, I had a few "bad" things that needed used up so that they were gone :) I had a can of condensed milk, well, closest thing you can get in Germany. It was a generic can that I got at a local Asian shop. You can not really buy the Carnation stuff here. I kept reading about how you can cook the can for a few hours and make caramel out of it, so I tried it. I cooked the can in boiling water for 4 hours, The result (I wish I had taken a pic, but I did not) was a wonderful thick caramel that had the color/flavor as it should. Now, I knew I had to make something with this or I would eat the whole can. I also knew this was a double no no as it is pure milk and I am not suppose to eat milk :( I have been wanting to make some shortbread caramel bars for a while so thought I would try that. I decided to just go with what I had and not follow any recipe. I did not write down amounts of what I did but I followed the basics of most recipes as a base.
For the base - I mixed in a food processor Almond Meal, mascoavo sugar and margarine- pressed it into a baking dish and baked for 15 min.
For the filling - I mixed the can of now caramel sauce with some margarine, vanilla and the rest of a jar of peanut butter that I had (I figured why not :)
For the chocolate - I melted some baking chocolate I had left with some ghee and sea salt.
I simply layered them and put it in the fridge for a few hours.
They turned out quite nice, but I do need to try to freeze some so that we don't eat them all :-D
Saturday, May 7, 2011
Happy Mother's Day - Gluten Free Chocolate Hydrangea Cupcakes
Happy Mother's Day!
So, I saw these early last week when I was browsing Pinterest and fell in love with them as Hydrangea are one of my favorite flowers (Fuchsia being the other). I had wanted to actually make some cupcakes and send to my mom back in the states. However, this would mean sending them express and I was shocked at the price - so, I made them anyway (will take them to friends tomorrow on a day trip) but they are still meant to be cupcakes for my mom :)
I used my standard chocolate cupcake recipe, but did not have any goat's milk or any kind for that matter, so I just used water - and they turned out the same :)
My frosting was a bit too stiff, but I had already bagged it and decided to just go with it, rather than thinning it out a bit.
Here is the original link on Glorious Treats Blog. And unfortunately, I don't have any actual Hydrangea plants to set them by for a picture like she did on her blog- so a boring pic from the kitchen counter will have to do.
I will definitely make these again!
Thursday, May 5, 2011
Gluten and Milk Free Heart Shaped Cinnamon Rolls
Ingredients
½ cube fresh Yeast (ca 20g of fresh or ½ package of dried yeast)
1/2 cup warm Milk (I used goat’s)
50 grams Muscovado Sugar
50 grams Margarine
1/2 teaspoon Salt
1 egg
50 grams Millet Flour
50 grams Amaranth Flour
50 grams Rice Flour
50 grams Tapioca Flour
50 grams Quinoa Flour
1 teaspoon Xanthan Gum
Filling
50 grams Muscovado Sugar
1 1/2 tablespoons Cinnamon
40 grams Margarine, softened
Icing
50 grams Powdered Sugar
50 grams Cream Cheese (I used goat’s)
1/4 teaspoon Vanilla
Directions:
In your stand mixer bowl fitted with the mixing paddle, dissolve the yeast in the warm milk with a pinch of the sugar.
Add sugar, margarine salt and egg and mix well.
Switch to your dough hook.
Combine your flours in a separate bowl and then add to the above mixture and mix on low speed until combined.
Knead the dough in your stand mixer until it forms a soft pliable ball. Cover the bowl and let rise in a warm place about 1 hour or until the dough has doubled in size.
Roll the dough out on a lightly (gluten free) floured surface, until it is approx 45 cm long by 30 cm wide.
It should be approx 5-6 mm thick.
Preheat oven to 200°C.
Combine the sugar and cinnamon in a bowl.
Spread the softened margarine over the surface of the dough, then sprinkle the sugar/cinnamon mix evenly over the surface.
Working carefully from the wide edge, roll the dough towards the other side, stopping when just shy of the center. Now roll from the other wide edge – towards the center again, until you are just shy of the center. You should now have 2 rolls facing each other with a tiny bit of space between them.
Cut the dough into 4-5 cm slices and place into a baking dish that is either lined with baking paper or greased.
Bake for 15 minutes or until light golden brown.
While the rolls are baking combine the icing ingredients.
Beat well in your stand mixer with the paddle until fluffy.
When the rolls are done, spread generously with icing
Serving Size: 1 (135 g) Calories 418 Total Fat 17 g Total Carbohydrate 65 g Dietary Fiber 4 g Protein 6 g
Tuesday, May 3, 2011
Gluten and Milk Free Baked Chicken with Pesto, Asparagus & Potatoes
This is one of the BEST meals we have EVER eaten!!! I can not believe the flavor that the pesto/asparagus combo brought out. And the potatoes - I could have eaten 10 servings!!!
I found some nice looking green asparagus at the local supermarket yesterday and I had some chicken in the fridge and so searched to find a recipe that looked nice and was not pasta. I found the perfect one using google. I also found these really cool baked potatoes recipe on Pintrest (my favorite new site). The result was absolutely delicious!!!
The recipe for the chicken/asparagus/pesto is found on Start to Simmer's blog. The only alteration is that I used only pecorino cheese (as have intolerance to cow's milk).
I made my own pesto using standard recipe from Food network, only using only 1/2 cup oil in total.
The potatoes came from Fish Food's blog.
And as you can see in the pic above, the result was absolutely delicious! I do not think I have enjoyed a meal so much in a very very long time!
Here is a closer look at the pesto
Sunday, May 1, 2011
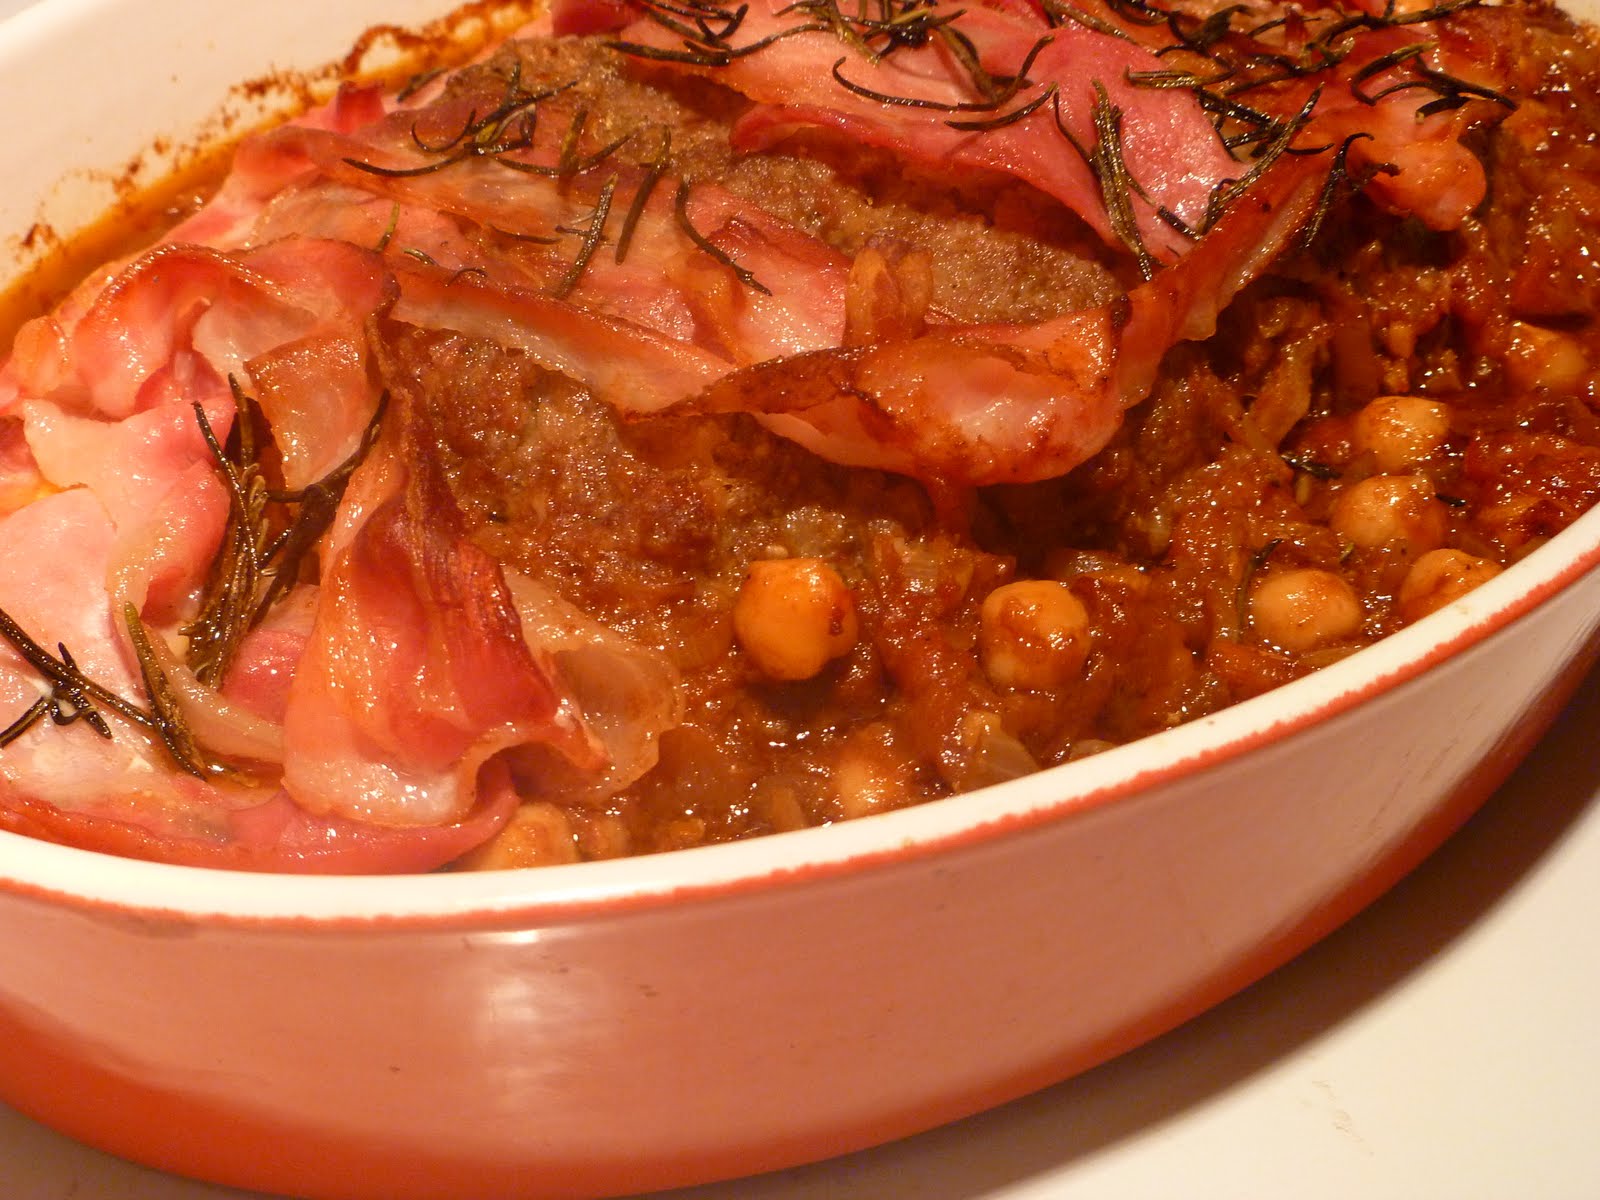
Gluten and Milk Free Meatloaf - Jamie Oliver Style!!!
As I posted last week, I love this new Jamie Oliver cookbook I bought. This weekend we made the meatloaf. What drew me to this instantly, was the "sauce" that went along with it. It was a mix of spices, chick peas and tomatoes and the meatloaf itself had great spices and bacon as well.
I will not retype the recipe, as it is here on this link. The only alterations that I made were to use a gluten free panier mix (basically dried gluten free bread crumbs) and left out the Worcestershire sauce.
One of the best things about this meal was cooking it together. We were very pleased with the outcome of this. It had a lovely mix of flavors and was more than enough on it's own for dinner, well, with a nice glass of red wine of course :)
Most fun I have had baking cupcakes. With one of my good friend's daughter.
As you know, I LOVE baking cupcakes and what is more fun than baking with kids :) A good friend of mine had an appointment near my house and asked if I could watch her oldest daughter (just turned 3) for an hour or so while she was there. I took this opportunity to have loads of fun with Lottie and doing some cupcake baking :)
I let her choose what we would do. She wanted vanilla with pink frosting. I made a few large cupcakes ahead of time (I put bright pink food coloring in them, so they were VERY pink. When she got here, we made another small batch of vanilla, but put blue coloring in them this time. We then made mini cupcakes with this batch. While they were baking, Lottie decorated the pink cupcakes herself. I did help with some of the piping (she couldn't quite hold and squeeze the bag with her little hands).
I got a few fun things for kids. Some animal sugar toppings, some princess sprinkles, gummy bears, mini smarties etc... She had so much fun and I let her do what ever she wanted to them.
She then took nearly all of them home with her for her Nan and Pop (aka grandma and grandpa) who had arrived that day from the UK to visit them. She was very proud of herself and her cupcakes, as was I.
Monday, April 25, 2011
Gluten and Milk Free Käsespätzle (German version of Mac & Cheese)
So, I have several Germans now following my Facebook page and my blog, so I decided since I live in Germany, I should try to convert more "German" dishes into gluten free dishes. I have already done the brez'n (pretzels) and the Flammkuchen (thin pizza) - now it was time to tackle Käsespätzle, the German version of Mac & Cheese!
The result was yummy!!! I have never actually tasted proper "normal" spätzle in any form, as have only lived in Germany as a celiac. But Guy has had it many times. He said this tasted and looked like "normal" käsespätzle, this made me very happy :)
If you have made spätzle before, you will find that this dough does act differently than the "normal" stuff with wheat flour. I am sure you could make this without the xantham gum and it would act more like the other stuff, but I felt it was needed to ensure that the spätzle held together in this recipe. In the end, it worked beautifully.
Gluten and Milk Free Käsespätzle
makes 2 large portions
For the Spätzle
100 Grams Potato Flour
50 Grams Millet Flour
50 Grams Amaranth Flour
½ Teaspoon Xanthan Gum
2 Egg
6 Tablespoons Water
Pinch of Salt
Mix all the ingredients in a stand mixer bowl until smooth. Because of the xanthan gum, the batter will be thick, but smooth.
Heat your oven to the lowest temperature.
Bring a large pan of water with salt to boil. Also, fill a bowl with cold water (this will be used for shocking the spätzle once you remove them from the boiling water, to stop the cooking).
Once the water is boiling, fill your spätzle press with the batter and press out some into the boiling water. I did this in 2 batches. The spätzle will remain on the top (when using wheat flour, they sink and then rise when cooked). Cook them for 3-4 minutes, then remove with a slotted spoon and place into the bowl cold water. Then remove from the cold water with the slotted spoon and place on a plate lines with paper towels. Once the paper towel has absorbed some of the water, transfer the spätzle to a large baking sheet.
Place the baking sheet in oven for 10-15 minutes (again, on the lowest setting) to dry out to Spätzle just a little bit, you aren’t cooking them more, just wicking some of the water away.
Now make the onion and cheese sauce:
1 Onion, Thinly Sliced
2 Tablespoons Olive Oil
2 Tablespoons Margarine (for onions)
1 Tablespoon Margarine (for cheese sauce)
1 Tablespoons Gluten Free Flour
1/3-1/2 Cup Goat’s Milk
1 Cup Grated Semi-Hard Young Goat’s Cheese
Salt and Pepper to taste
Preheat oven to 200°C. Spray pan with no-stick spray or smear with margarine.
In a large saucepan, place 2 tablespoons olive oil and 2 tablespoons margarine over high heat. Add onions. Cook over high heat until the onions start to brown. Stir frequently. Reduce heat. Add salt. Cook onions until soft and golden brown, this can take 10 min or so. Stir frequently and scrape the juices off the bottom of the pan. Then add the spätzle and heat through over moderate heat. It is ok if they brown a little. Set aside.
To make the cheese sauce, first make a roux by melting 1 tablespoon of margarine in the pan. Gradually sprinkle the flour and immediately begin stirring. Do not let the margarine/flour burn so stir constantly until a paste forms. This will happen very quickly. Slowly add the milk and continue stirring until you have a white creamy sauce. If the mixture gets too thick, add additional milk. You may use all of the milk, you may not, it depends on the flour you use. Just keep stirring until it looks like a nice white sauce. Then add the grated cheese and salt and pepper. Continue stirring until all the cheese is melted. If you need, you can add some more milk here.
Mix the spätzle and the cheese sauce together and transfer to the prepared pan. Bake at 200°C until the cheese has melted and starts to brown on the top, approximately 20 minutes.
Saturday, April 23, 2011
Gluten and Milk Free Pasta & Baby Spinach with Baked Goat's Camembert
As you can see, we have our camera back :-)
I was visiting a friend the other day and she had a new cookbook. I was flipping through it and had to admit that even though I have never been a Jamie Oliver fan (mostly because I have only ever seen him in German and the dubbed voice they have for him is extremely annoying!!!), I loved this particular cookbook. As I was flipping through the pages, one of the pictures really caught my eye. It was a pasta dish with camembert. What caught my eye was that the camembert was baked in the wooden container it came in. Something about this really appealed to me. So, I made a trip to the larger Karstadt in the city with a large selection of cheeses. I was able to find a nice French camembert made from goat's milk.
By the time I got home with the cheese EVERYTHING stank! I had never had soft cheese like this that had such a horrible smell. I was sure it had gone off. I then chatted with another friend who said that yes, some of the soft goat's cheeses smell. So, I stuck it into a zip lock and put it in the crisper. By the next day, the entire fridge stank. I was having my doubts about this recipe.
Today, we made it. I followed Jamie's recipe from "Ministry of Food" to the tee, except of course, I used gluten free pasta and for the cheeses, I used pecorino ramano and goat's camembert. I also added 2-3 times the amount of rosemary (my Guy loves rosemary) as well as adding some rosemary and garlic to the water that the pasta was boiling in.
The result was a beautiful blend of cheeses and spices that went wonderfully with the pasta/spinach. I was a bit afraid that the cheese would end up melting all over the place. The last time I bought a goat's camembert (a much cheaper brand only wrapped, not in the nice wood holder) and baked it inside of some pastry dough, it leaked all over the place. So, I made a little form of aluminum foil inside the wood holder and then put the cheese in that. But to my delightful surprise, the cheese inside baked perfectly leaving the outer "skin" in tact.
I can not recommend this highly enough. It was so delicious!! I purposely only made 2 portions (cut the recipe in half) and am wishing I had not, so that we had left overs.
I won't retype the whole recipe, but here is a link to a condensed version (only the instructions have been a bit condensed, the ingredients are all listed. Again, to make this gluten free, you only need to use any gluten free pasta that you like and if you are also cow's milk intolerant, just use goat's camembert.
Friday, April 22, 2011
Gluten Free Easter Egg Cupcakes
I was not sure what to do for Easter cupcakes, so I decided to do a few different ones. Knowing that we can not eat them all, I have boxed almost all of them up to give to friends over the weekend. I really wanted to do some with the Cadbury cream eggs. I was lucky enough to find a shop here in Munich that sold them. They cost a pretty penny of course, so I only put them into 6 of the cupcakes. I am not sure who will get them, as I mixed them all up. But a few lucky people will be biting into some awesome goodness this weekend :)
Gluten Free Easter Egg Cupcakes
Makes 20 cupcakes
Dry Ingredients:
20 grams Quinoa Flour
40 grams Millet or Sorghum Flour
40 grams Amaranth Flour
20 grams Rice Flour
15 grams Tapioca Flour
2 teaspoons GF Baking Powder
75 grams Dutch Cocoa Powder
1/2 teaspoon salt
150 grams Muscovado Sugar
Wet Ingredients:
40 grams Milk Free Margarine softened
2 eggs
1.5 teaspoons GF Pure Vanilla Extract
1/2 cup Goat’s Buttermilk
1/2 cup Goat’s Milk
Sift all the dry ingredients together in a bowl and set aside.
Mix all the wet ingredients in a stand mixer (or in a bowl with a hand mixer) until well blended.
Slowly add the dry ingredients to the stand mixer while on low (2) speed. Once all ingredients are combined, mix on speed 3-4 for a minute or two until well mixed. Do not over mix!
Fill cupcake liners 2/3 full. Unwrap and place a Cadbury Cream Egg into the cupcake batter. Bake at 180°C (350°F) 18-20 minutes. Remove from oven and let stand for 10 minutes, then remove from pan and place on wire rack to cool
Let cupcakes cool completely!!
For the grass, I used tip #233. For a video on how to pipe grass, here is a good youtube video from Wilton.
I used the same tip with some brown frosting to make the nest and put Cadbury chocolate mini eggs into them. For the Baskets, I used a licorice stick for the handle and peeps and jelly beans for the decorations.
Sunday, April 17, 2011
Sheep's Cheese with Chocolate. Yes, you read it correctly :)
So, I was at my local Karstadt (at Nordbad) yesterday searching for some different sheep's or goat's cheese to try. I found a lovely pecorino with chili's - Yumm!!
I was sure that I had misunderstood the lady behind the counter when when she offered me "Schafskäse mit Schokolade" to try. Now, my German is OK, but I was sure I misunderstood her. She then pointed to a block of sheep's cheese with chocolate. I was a bit skeptical, but I did try it. It was actually quite nice. It had a nice mild flavor with a nice bite of chocolate, as well as whole hazelnuts too. The chocolate was not overpowering, nor was it too little that you didn't notice it was there. I did not buy any (as I had already had her cut a huge chunk of the one with chili) and while it was nice, I could not see using it for everyday eating at home (the chili one however, I could eat every day :) Perhaps next time we have company or make a nice little cheese try, I may buy some.
They also had (same brand) sheep's cheese with pistachios. This I did not particularly care for. It was not bad at all, just for me, the 2 flavors just didn't go well together.
Just wanted to share for any others of you out there in Munich who can't have cow's milk (or for anyone really). This is a great alternative for cheese :)
Subscribe to:
Posts (Atom)